
The VarSeq platform has been on the market for over a decade and has established itself as robust and powerful clinical-grade bioinformatics software. Its usage spans many types of analysis, including pharmacogenomics, rare disease, hereditary cancer, somatic, carrier risk, and trio/family. Fundamentally, users have the freedom to build any workflow they need, which is a significant value proposition compared to other platforms on the market.
Three Key Steps in VarSeq: Design, Evaluation, & Reporting
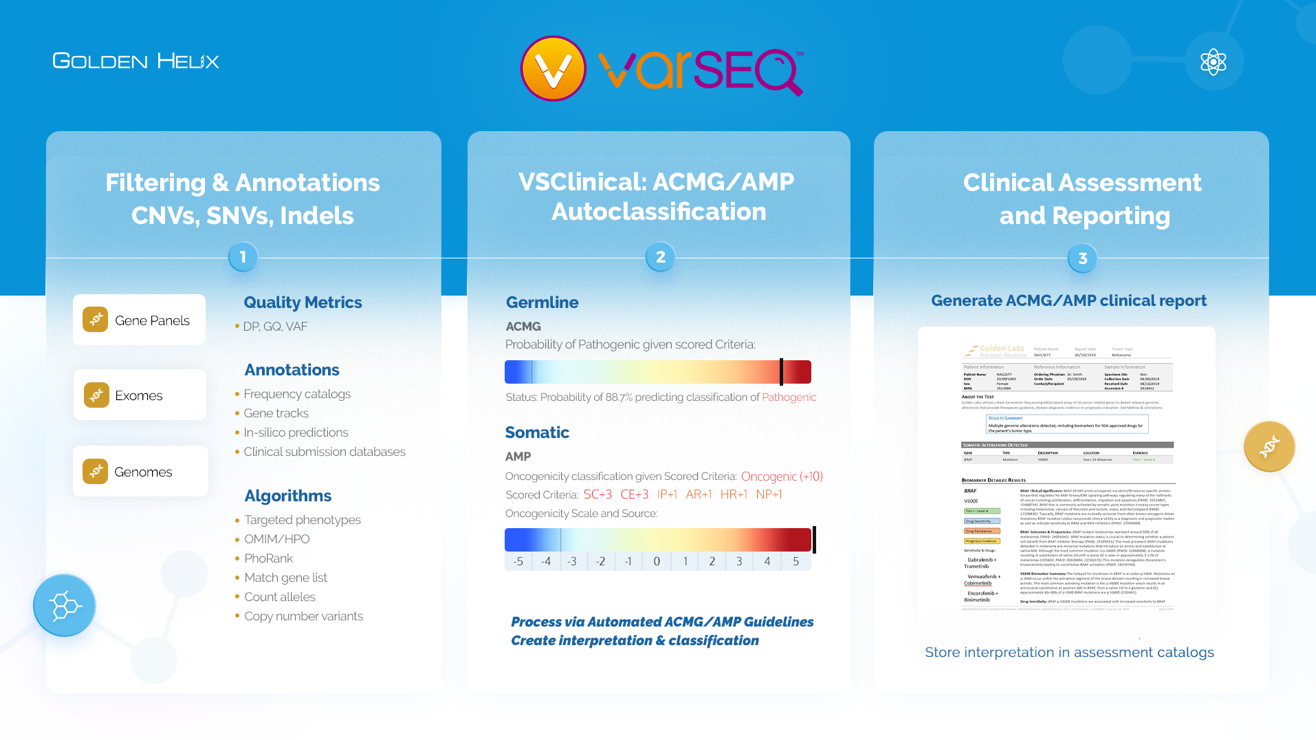
Let’s walk through the major steps of the VarSeq usage (illustrated in Figure 1):
- Step 1 is the design stage, building a filtering strategy that leverages a wide range of custom and public databases, as well as algorithms in the software to isolate the relevant variants.
- Step 2 is dedicated to the evaluation process, where users can automate the capture of classification criteria following the ACMG and AMP for germline or somatic analysis.
- Step 3 is for reporting, where the user can render the final report for their clinical variant with a click of a button.
A fundamental objective is to automate as much of this process as possible without removing the necessary expert oversight on reportable outcomes. Each of these steps can be streamlined with fine-tuned control of the breadth of automation. At the same time, a user aims to implement the necessary degree of automation, the user may also need to customize the workflow to suit their needs. We address customization in Step 2, specific to variant evaluation.
Selecting a Variant and Preparing for ACMG Evaluation
Let’s begin by discussing the selection of a variant and preparing for evaluation. In the bottom half of Figure 2, you can see a screenshot of the variant table with a flagged SMAD4 variant auto-classified as pathogenic. In the top portion of the image, you can also see a record of established pathogenic submissions in ClinVar. With this information provided, the user then transitions to the ACMG Guidelines tab at the top of the project.

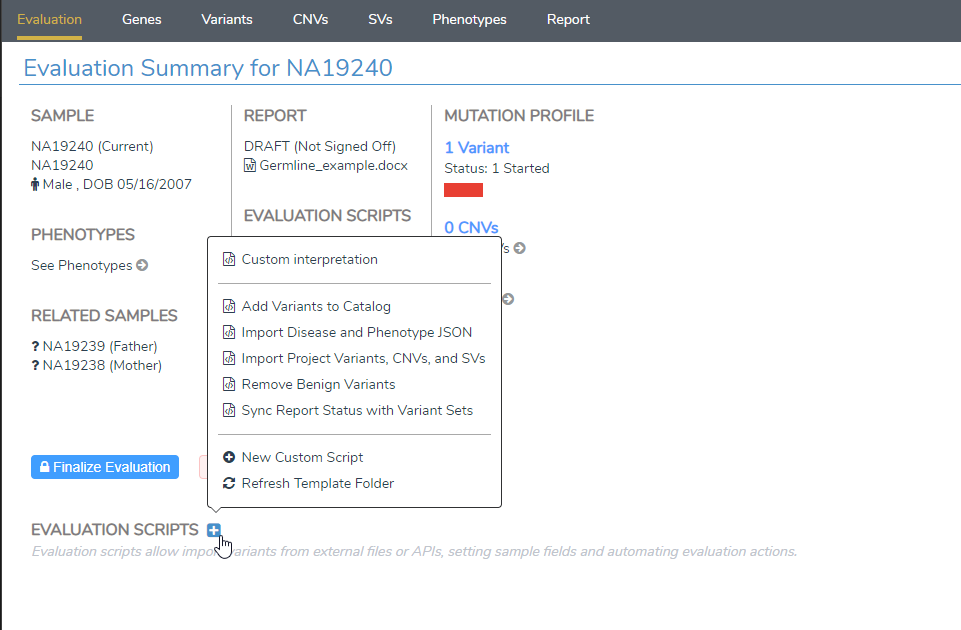
This ACMG Guidelines tab is our VSClinical interface referenced in Step 2 from Figure 1 and is the environment guiding the user through the ACMG and AMP guideline review. The first view in VSClinical is the Evaluation tab, seen in Figure 3. The purpose of this tab is to pull the variants from the table in Figure 2 and other sample data into the final evaluation.
Among the features in the evaluation tab is the Evaluation script option. This feature allows users to design scripts that handle unique processing that may not be in the default software. We have hosted template scripts that the user may find helpful to start from when designing their own scripts. For example, one might automatically pull all variants from the variant table in Figure 2, but remove benign variants and focus only on pathogenic results.
Using Custom Scripts to Streamline Variant Interpretation in VSClinical
At the top of the list of scripts in Figure 3 is a custom script built from scratch that allows the user to define their preferred inputs when constructing an interpretation in VSClinical. You can see in Figure 4 a paragraph of text that VSClinical automatically compiles for the user to generate a comprehensive interpretation based on all available variant evidence. This level of depth is useful, but in many cases, it may be overkill for some users.
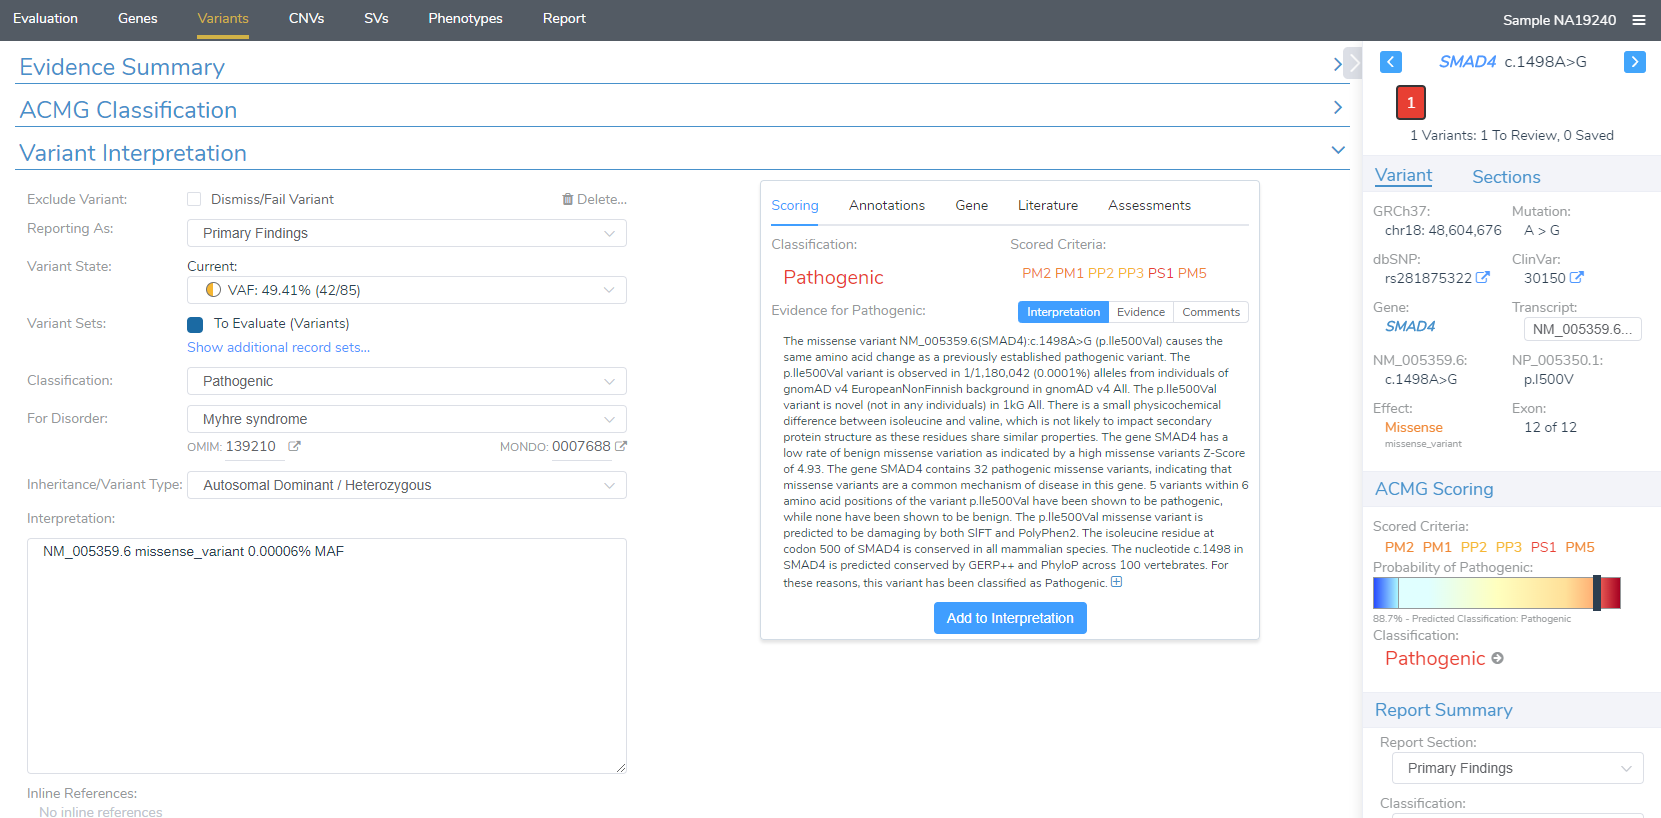
On the left side of Figure 4, you’ll see an interpretation box with more succinct information for contrast, including transcript, sequence ontology as missense, and the minor allele frequency from gnomAD. Without the Custom Interpretation script in use, this box would normally be empty, and the default approach would be to click the blue Add to Interpretation button, copying and pasting the whole paragraph.
Customizing the Final Report and Workflow Integration
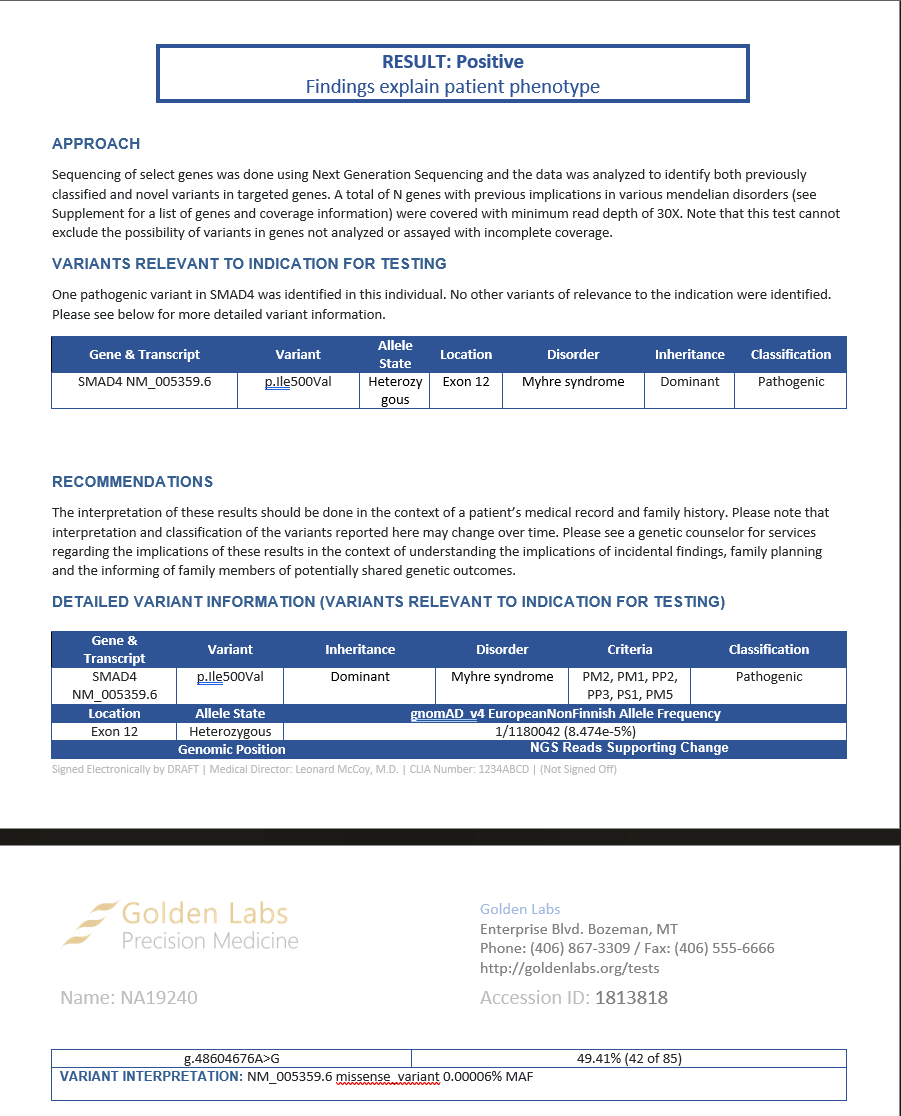
After completing the evaluation, the user would move to the last tab on the right, labeled ‘Report’. As you can see in Figure 5, the report’s interpretation section comprises the text generated from the Custom Interpretation script. In addition to customizing the evaluation scripts, the user can fully customize Steps 1 and 3 for workflow design and report, respectively.
The example in this blog is a simple demonstration of the possibilities. Fortunately, for our audience, we are hosting a webcast covering a wider range of use cases for evaluation scripts. I’ve included the link to attend here.
Our goal is to provide robust, clinically grade software that gives the user a perfect blend of simple utility and the necessary bioinformatic flexibility to design their desired workflow. Don’t hesitate to contact our team if you would like more detailed training on any of these or other workflow topics in VarSeq.