We at Golden Helix are thrilled with our recent release of gnomAD v4! The curation of this massive database was a huge undertaking for our development team, but with the addition of new features, we believe it was well worth the wait. This annotation track contains allele frequencies from a more diverse population than ever before, with the addition of functional effects from REVEL, CADD, PhyloP, spliceAI, and Pangolin! With the addition of this awesome new track, many of our customers have been asking how we can incorporate it into our ACMG auto-classifier for use in VSClinical. Have no fear; this handy guide will take you step-by-step through the process. Before we get started, it is important to note that in VarSeq version 2.5.0, you will have to add this database to the classifier frequencies manually. In future versions, VarSeq 2.6.0 and onward, the addition of the gnomAD v4 Joint Frequencies Track will be automatic (read more about the gnomAD v4 Joint Frequencies Track here). That being said, for templates made in VarSeq 2.5.0 and prior, you will still need to manually add gnomAD v4 to your workflow. With that, let’s get started!
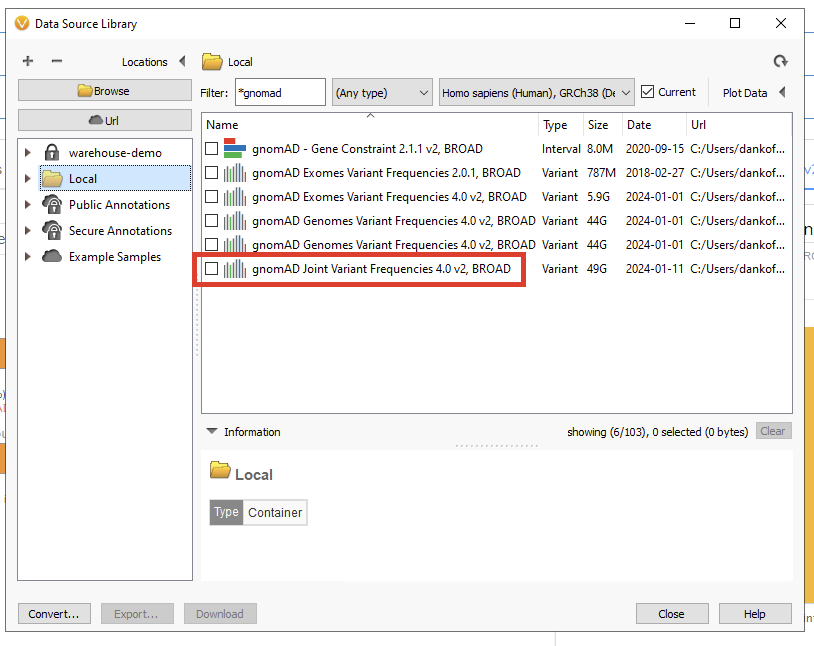
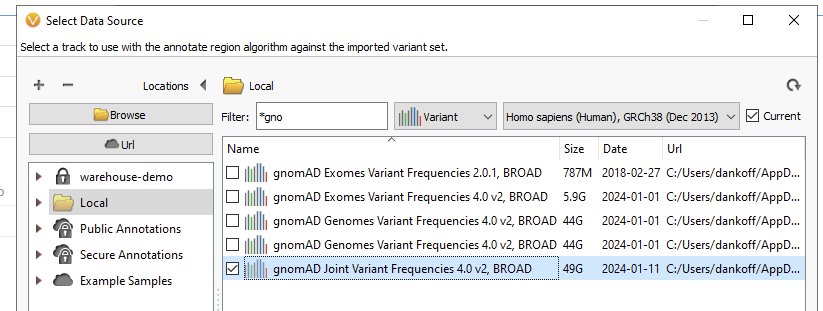
First, you will want to go to your Data Source Library and download the gnomAD database of your choice (Figure 1). Here we have gnomAD v4 for Exomes, Genomes, and the Joint Variant Frequencies track. Make sure you start this process well ahead of adding it to the classifier, as these files are quite large, and downloading may take some time.
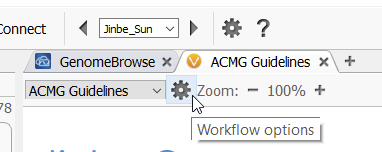
After gnomAD v4 has been downloaded, go to the Gear Icon in VSClinical (Figure 2). This is where you can change your workflow options.
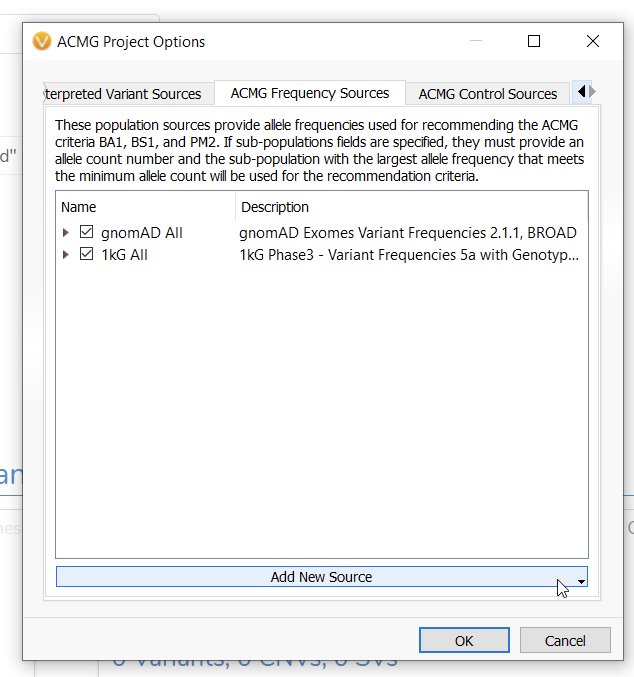
Inside of the Project Options menu, go to the ACMG Frequency Sources (Figure 3).
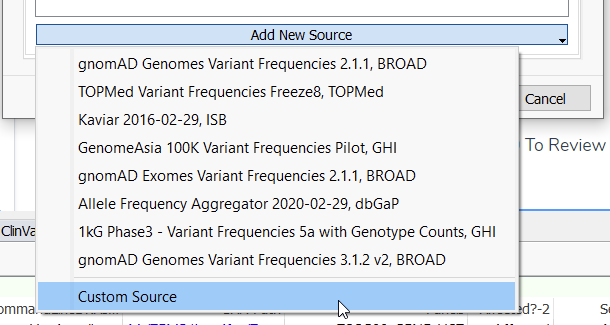
From the Add New Source menu, you will see there are a variety of databases already available for use as a frequency database (Figure 4). This includes older versions of gnomAD Genomes, TOPMed, GenomeAsia, and more. Here we will add a Custom Source for gnomAD v4.
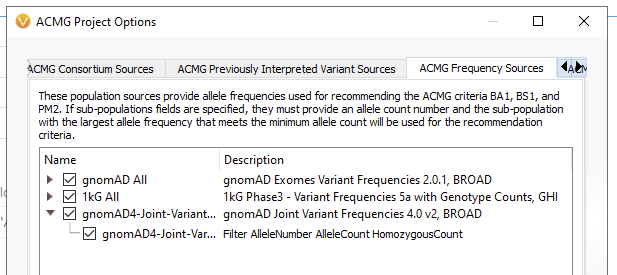
If you want to be specific to Exomes or Genomes, you can add one of those databases. In future versions of VarSeq, the default will be the gnomAD Joint Variant Frequencies v4 (Figure 5).
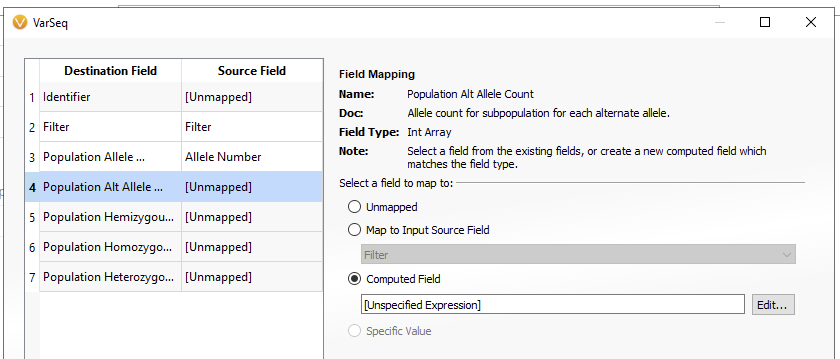
Once you have selected your version of gnomAD, you will be brought to the Field Mapping screen (Figure 6). Here you will notice that not all of the Destination Fields are mapping to corresponding Source Fields. In addition to the Filter and Population Allele Number, we will need the Population Alt Allele Count and the Population Homozygous Count fields at a minimum to work in the classifier. This will require using a computed field to bring in the source field as the correct data type. First, go to the Population Alt Allele Count. Select the Computed Field option, then hit Edit.
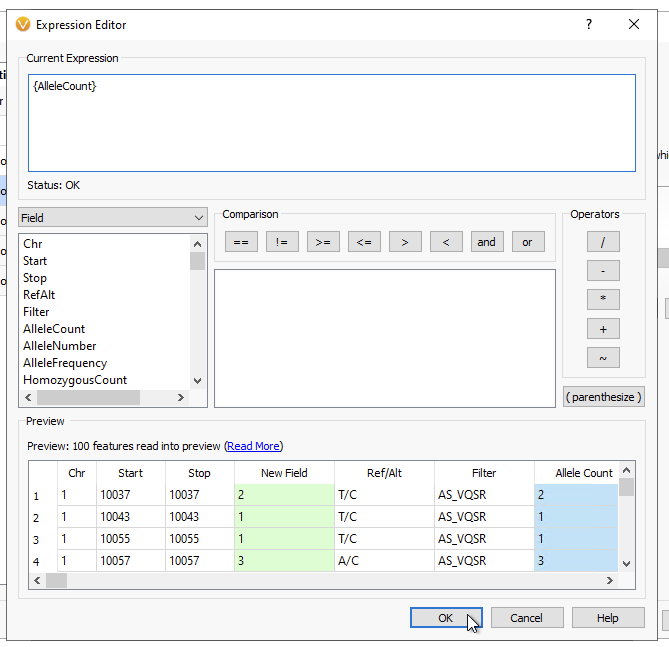
In the Expression Editor, enter {AlleleCount} as seen below as the Current Expression (Figure 7). Leave the other options as is, then click OK.
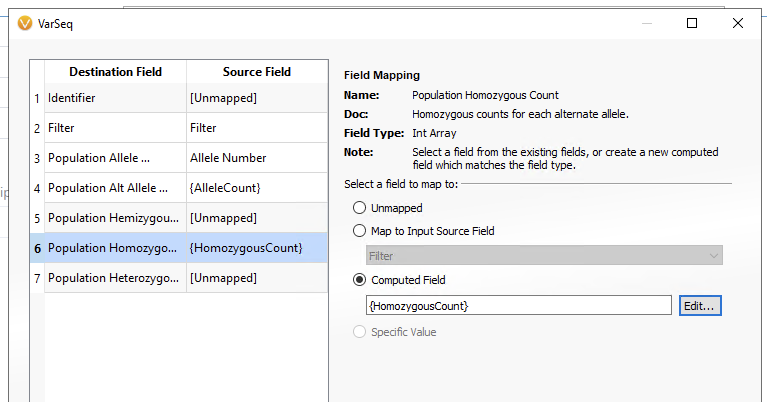
Repeat the same steps adding {HomozygousCount} for the Population Homozygous Count Destination Field below (Figure 8). When you are done, you can click OK.
You should see the new gnomAD v4 database added to the ACMG Frequency Sources menu (Figure 9). When you are ready, click OK.
When starting a new evaluation in VSClinical, there will now be a new gnomAD v4 field available under the Population Frequency menu (Figure 10). To keep these changes for future workflows, make sure to update your project template with the new gnomAD v4 database.

Please let us know at [email protected] if you have any problems or questions about this process!