
The ability to import patient-level information into VarSeq and VSClinical can not only save time while evaluating a sample but can be a critical step in automating project creation through VSPipeline. Here we will review how to construct a basic text manifest and how to apply that manifest to a project. Those fields can then be rendered into the final clinical report.
What Goes Into a Text Manifest:
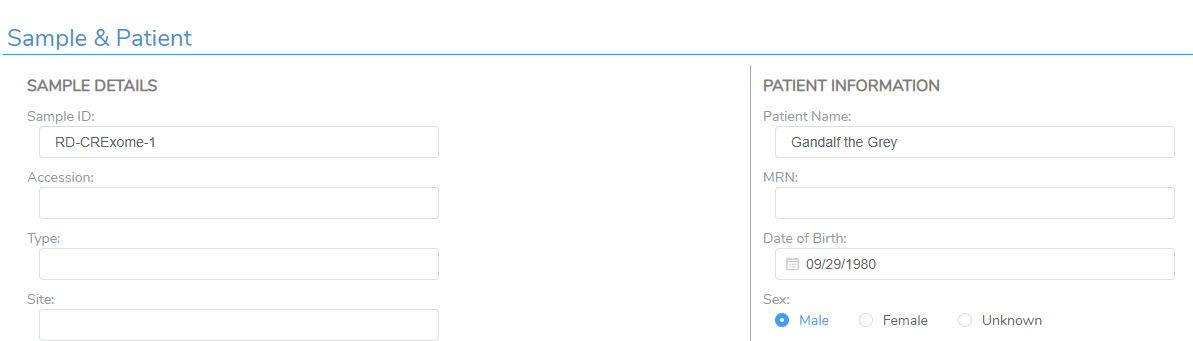
There are many different fields that can be brought into the final report via the text manifest, including those that are germline or somatic in nature. For any of these fields, there is the ability to manually add the information into the VSClinical evaluation, which may be a viable option if you are processing a small number of samples at once. When processing many samples, however, a text manifest can both speed up the process and help keep the information between samples clear. Here we can review some of the fields found in an ACMG-based evaluation (Figure 1). These include the sample level details, including the Sample ID, the collection method, collection dates, and more.

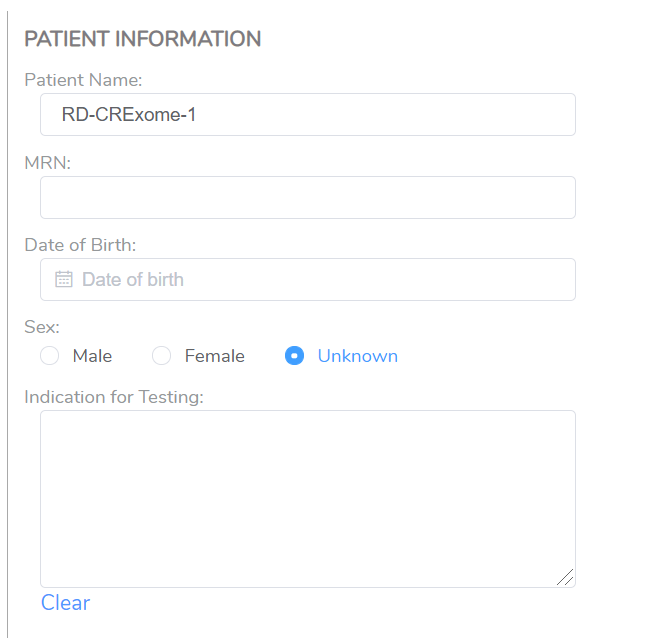
You will also have the ability to bring in patient-specific information, such as the patient name, which usually is different than the sample ID (Figure 2). Fields like the date of birth or indication for testing may also be important for the final report.
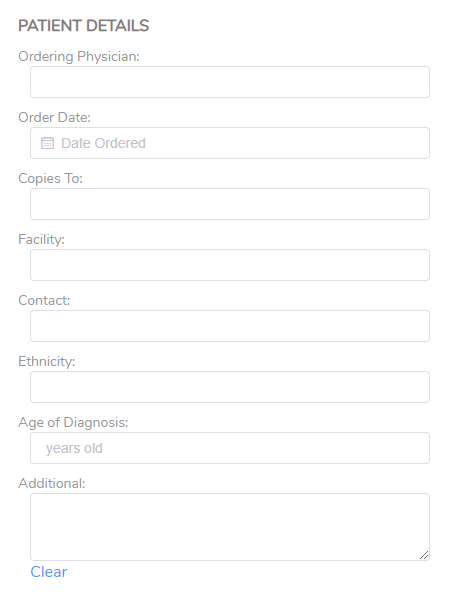
The patient details may include fields such as the Ordering Physician, the Facility, or Additional for other notes needed for the final report (Figure 3).
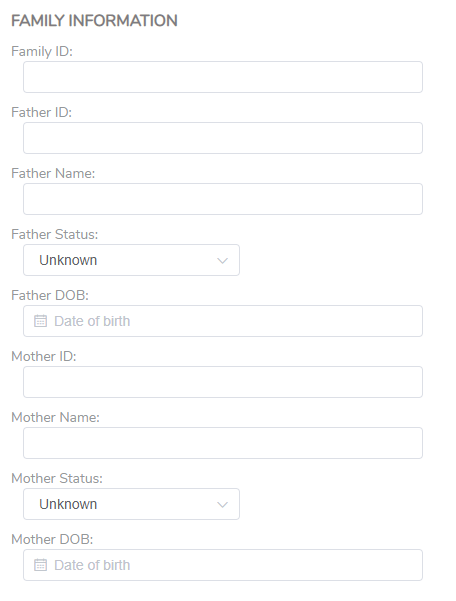
Finally, specific to the ACMG analysis, there is a section for family information (Figure 4). This is especially helpful in the event of running a Trio analysis, where the parent’s information will be added to the final report.
For a somatic workflow, there are many tumor-specific fields that can be brought in on a manifest, including tumor type, purity of the tumor, and more. When it comes to bringing in information on a text manifest to include in VSClinical, and then the final report, know that you are not limited to just the fields available shown here. If there is information that can be presented in a text tab-delimited format with report customization, it can likely be brought into that final report.
Creating a Text Manifest:
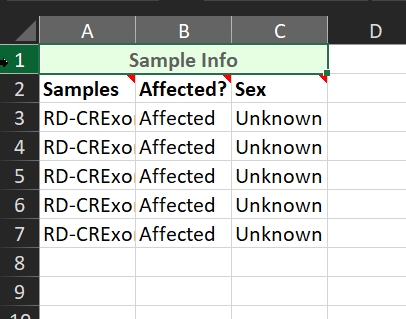
There are several different ways to make a text manifest. A fairly straightforward method is by using Excel, as shown below. When crafting the manifest, include only the specific field headers. For example, in Figure 5, there is an overarching field called ‘Sample Info.’ This field is unnecessary and will cause an error in VarSeq on import. The fields that are needed are seen on line two, such as the sample name, affection status, and sex of the patient.
Here is an example of a slightly more fleshed-out text manifest, where we have included the patient names and corresponding dates of birth (Figure 6). Starting with this simple text manifest, let’s walk through the next steps for getting that information into the VarSeq project.

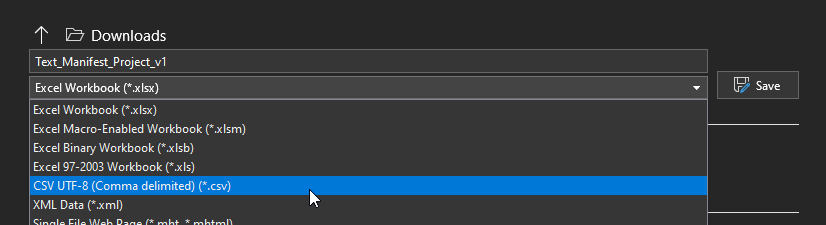
First, we need to save it in the appropriate file format. VarSeq will not accept a file format in ‘excel workbook’ format; it will only take a text document in CSV UTF-8 (comma delimited) (Figure 7), as seen below.
When saving into this format with Excel, you will get a warning that data loss can happen in CSV format (Figure 8). For our purposes, you can ignore this warning and save your manifest.

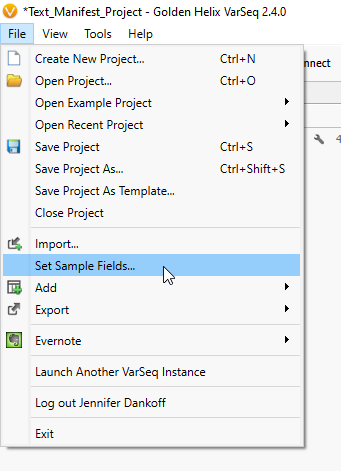
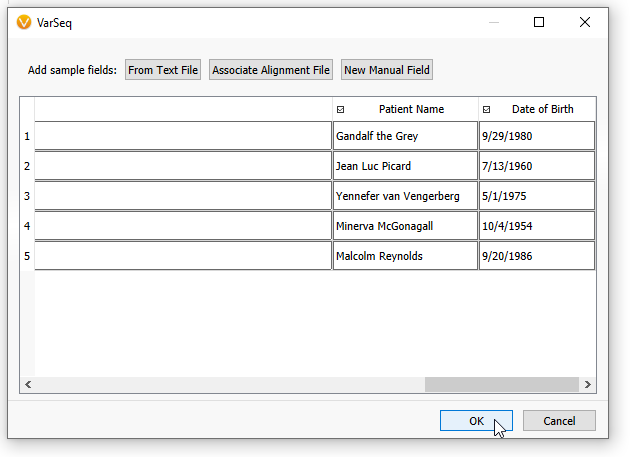
Now that you have a text manifest describing data for your patients, the key is to add the manifest to your project. You can do this while importing VCFs to your project for the first time with the Add Sample Fields: From Text File option (Figure 9), or if your project has already been created, you can add these fields after the fact by going to File > Set Sample Fields (Figure 10), as seen below.
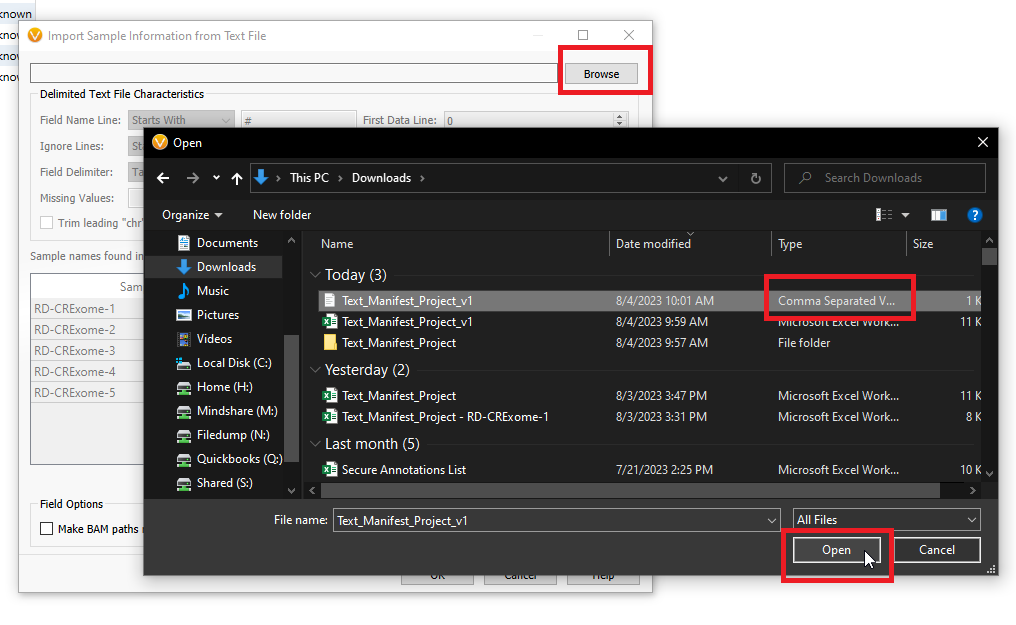
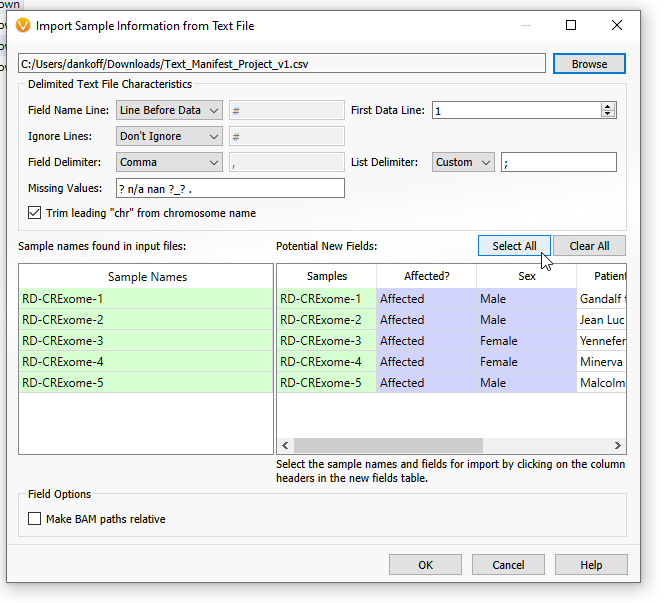
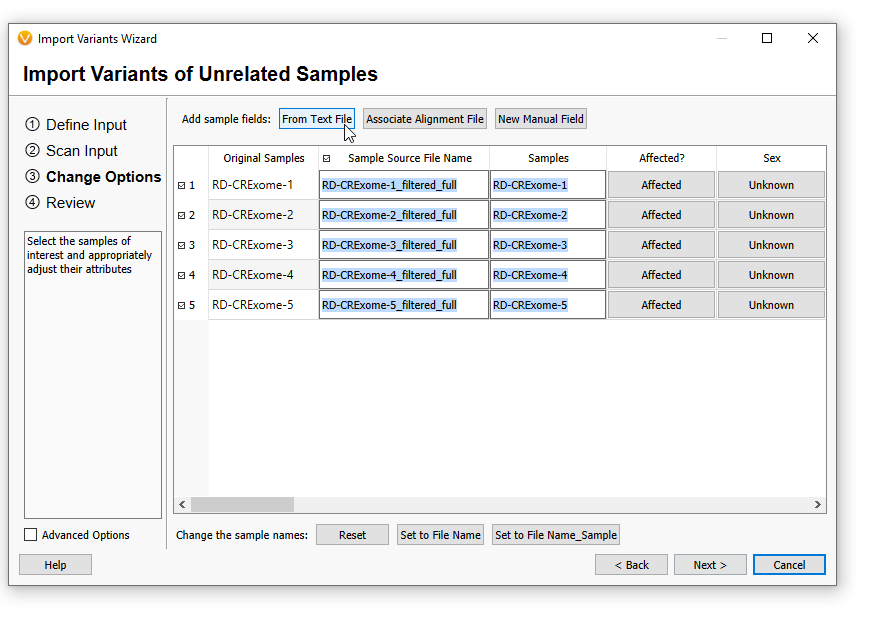
After clicking on Add Sample Fields > From Text File, you will see a screen similar to the one below (Figure 11). Here you will Browse to the location where you have saved your manifest, and you will look for the CSV format file. Then, click Open.
The new fields are now available to be brought in. Make sure to click ‘Select All’ to turn the new fields purple, indicating they will be imported (Figure 12). Then click OK.
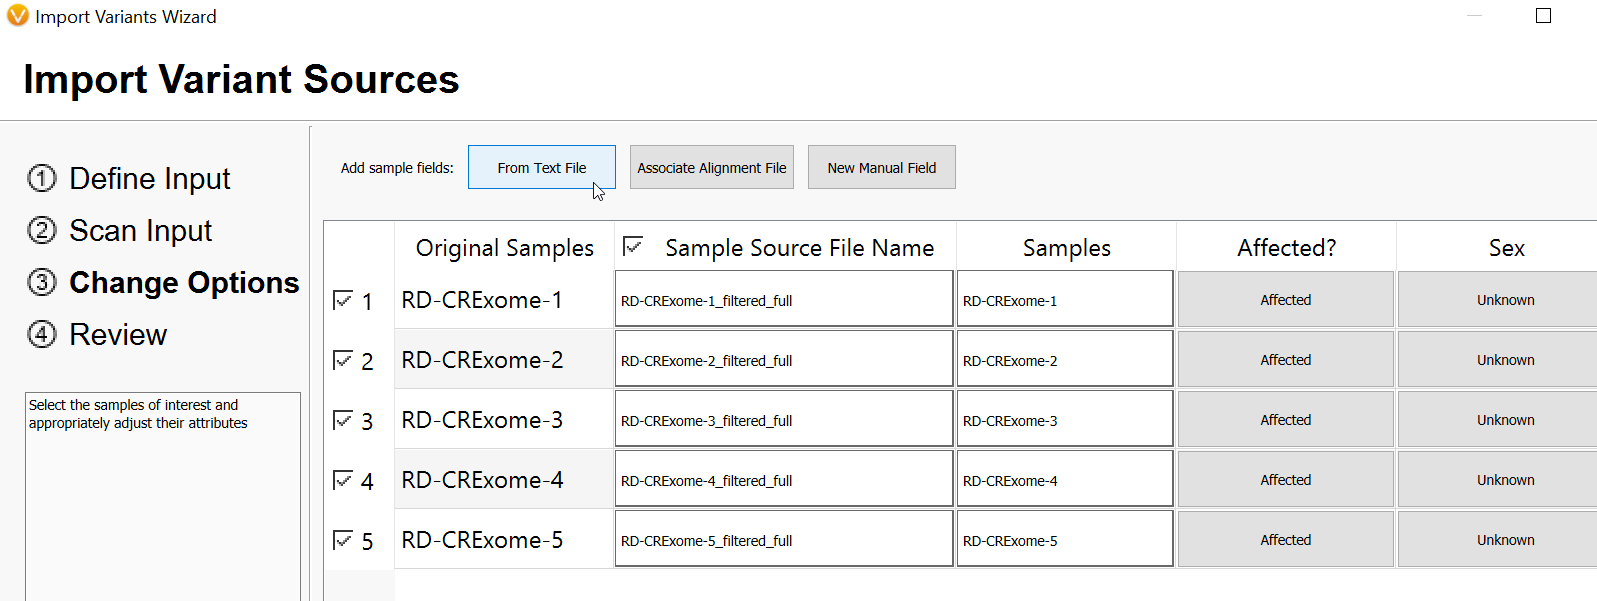
On the next screen, you can scroll to the right, and the new patient-level information will be associated with their specific samples (Figure 13). Hit OK.
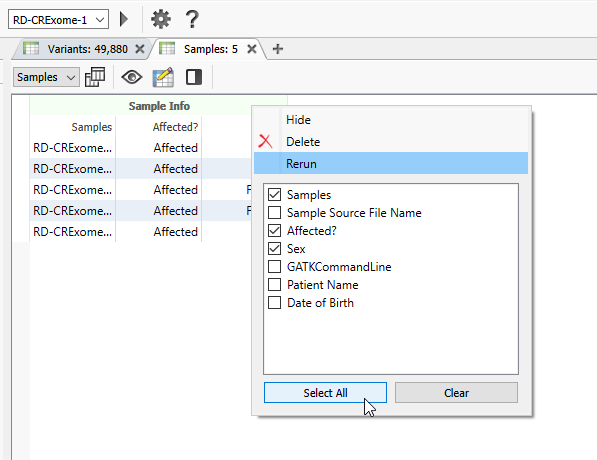
Back in VarSeq, your new fields will not be immediately visible in your Samples Table (Figure 14). Make sure to right-click on the Sample Info field and select the samples you wish to view.
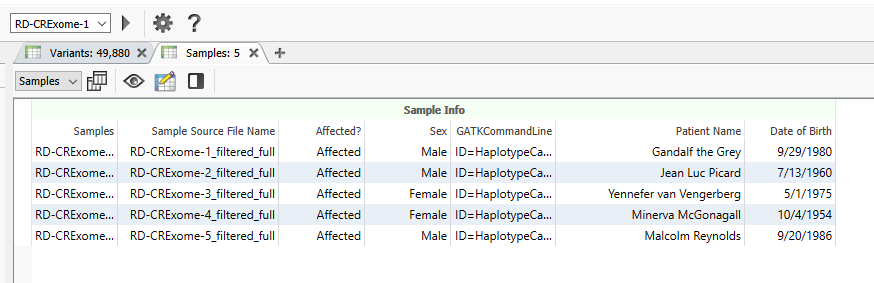
As you can see, the Sex, the Patient Name, and the Date of Birth has been updated for the five samples in this project (Figure 15).
Moving into the VSClinical assessment, you can see the corresponding Patient Name field now has information (Figure 16). This was a fairly simple example, but all fields in this section could be filled in, in addition to custom fields specifically meant for the custom report template.
Bringing in Sample-Specific Phenotypes or Genes Lists:
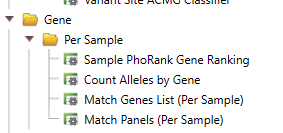
Now that we have a grasp on a basic text manifest let’s explore a slightly more advanced utility of the text manifest. In VarSeq, there are a number of algorithms that take a sample-by-sample input, as opposed to applying a single input to an entire project. For example, you may create a workflow template that applies the phenotype ‘global developmental delay’ to every sample in the project. This is great if you have a large number of samples that work with ‘global developmental delay,’ but it is not helpful if you have a mix of samples that all have different and specific phenotypes, gene lists, or panels. In this case, you will want to apply the Per Sample algorithms (Figure 17).
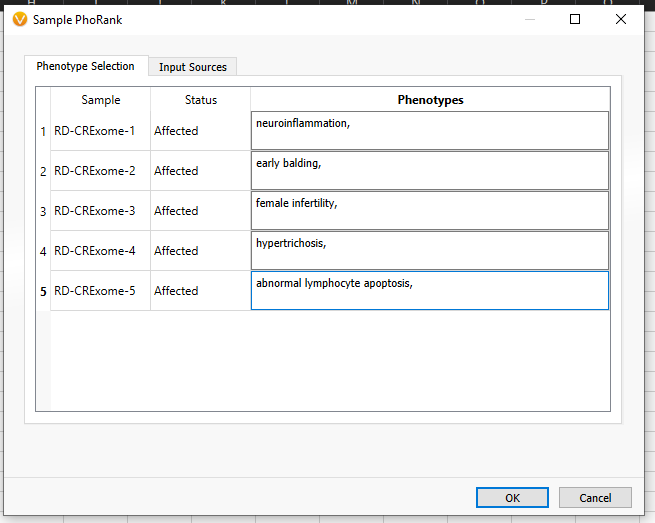
Here we are looking at the input for Sample PhoRank, where each sample has its own corresponding phenotype (Figure 18). In order to avoid putting in phenotypes for each of these samples at this stage, we can save time by 1) Having a Per Sample Algorithm built into the project template and 2) Building a text manifest that specifies the phenotypes or other per-sample information.
Addressing Step 1 of this process, we have created a very basic workflow that uses the Sample level PhoRank, where each sample in this project requires its own input (Figure 19).

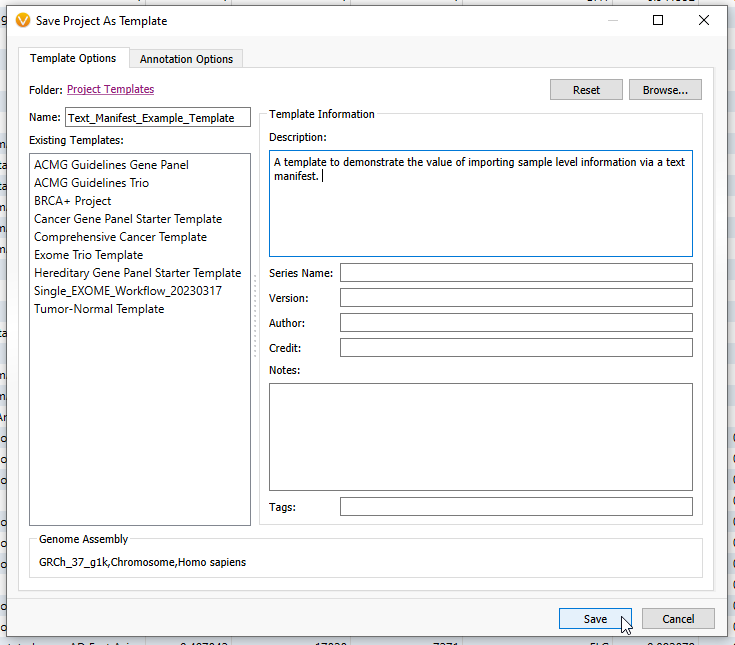
Next, we can save that workflow as a template, so any time I have new samples, they can undergo the same workflow (Figure 20).
When I next start a new project and have selected my VCFs, I can go through the same process as before and associate my Text Manifest on import (Figure 21).
After the project finishes annotating and filtering, I can click on the half-white and half-black box, along with the PhoRank column header, and I can see that each sample in this project has its own corresponding HPO term for a PhoRank search.
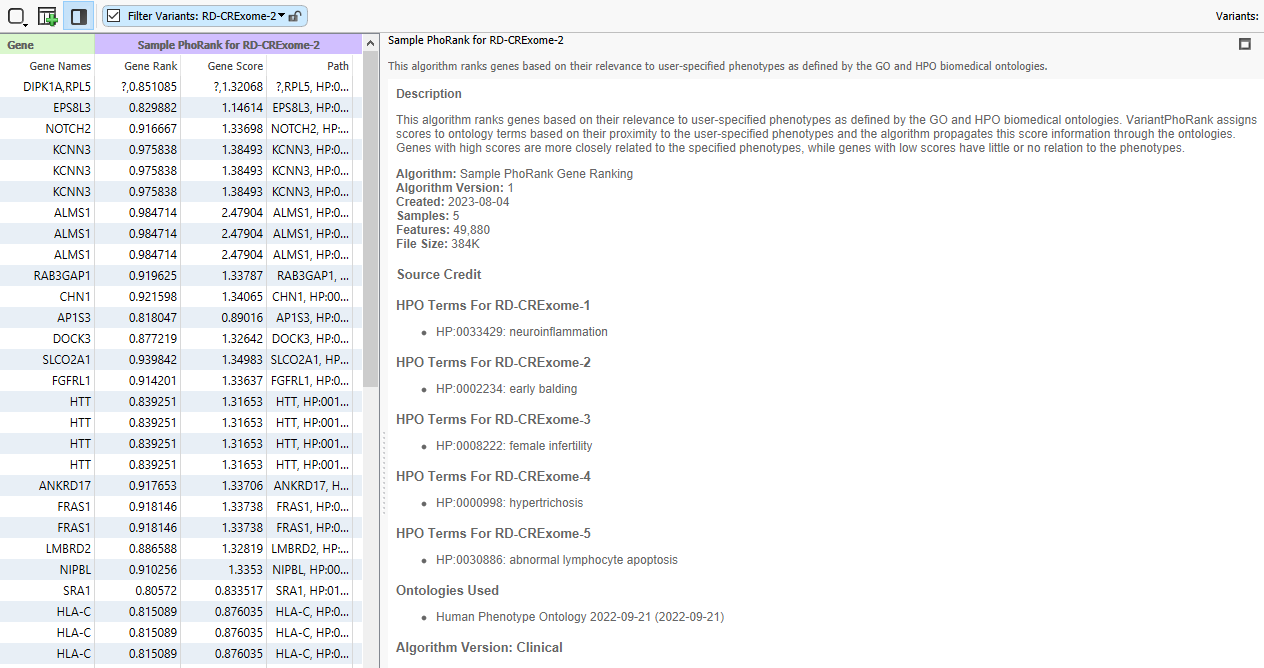
Through this method, I can take a basic workflow and make it multi-purpose by feeding in the sample-specific phenotypes for use in PhoRank. This method also works with other information, like gene lists. If you need help implementing text manifests into your workflow, or if you would like to talk to us about increasing automation in your workflows, please reach out to [email protected], and we will be happy to assist!